Exchange 2013: SSL Certificate Installation Guide
A comprehensive guide to SSL management on Exchange 2013, covering DNS planning, Split-DNS setup, CSR generation, certificate installation, and service assignment.
Exchange 2013 (EOL april 2023)
Products that no longer receive updates.

A comprehensive guide to SSL certificate management on Exchange 2013: including DNS planning, Split-DNS configuration, CSR generation, certificate installation, and service assignment.
Moving from Internal to Publicly Valid Server Names
When Exchange is first installed, the default configuration typically uses an internal server name for local communication. However, it is no longer possible to include internal server names (such as .local or .lan domains) in publicly issued SSL certificates. Since Exchange cannot assign multiple certificates to a single service, you must configure the server to use externally valid DNS names exclusively.
Examples of invalid internal server names:
- server01
- exch01.fairssl.local
- srv01.fairssl.lan
- localhost
- 192.168.100.10
- 10.0.0.10
This setup requires one or more DNS names that can be accessed both externally and internally to point to the Exchange server, and the Exchange configuration must be updated to recognise these names.
We recommend one of the following two common solutions:
Split-DNS
A single DNS name, e.g., webmail.fairssl.com, resolves to the internal IP address of the Exchange server on the local network, while resolving to the public IP address when accessed from the internet.
If you do not want to manage the entire domain as a split-DNS zone, you can create a specific sub-zone for the server name itself (e.g., mail.fairssl.com) to limit the split-DNS scope.
See the guide for setting up Split-DNS
Once configured, update the server's internal and external URLs to use this single name.
Two DNS Names
Alternatively, use two different DNS names for internal and external access. This is common practice for organisations using a public subdomain for internal use, such as intern.fairssl.com.
For example, webmail.fairssl.com could point to the external IP, while exch01.fairssl.com points to the internal IP.
Afterwards, simply configure the Exchange internal and external URLs to match these names.
Setting up Split-DNS
- Log in to your Domain Controller using an administrator account.
- Press Windows Key + R and run the following command to open the DNS Manager:
dnsmgmt.msc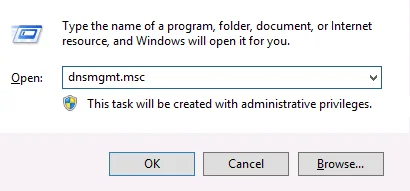
- Right-click on Forward Lookup Zones.
Select New Zone.
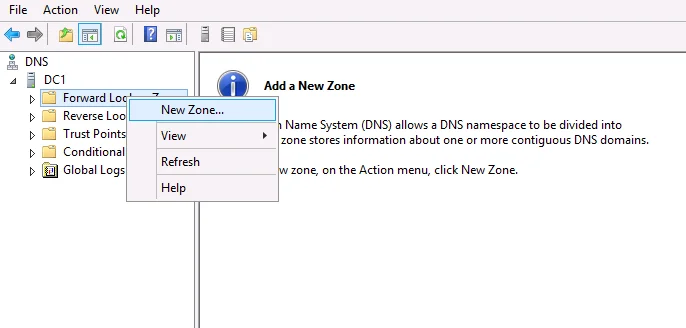
- Click Next.
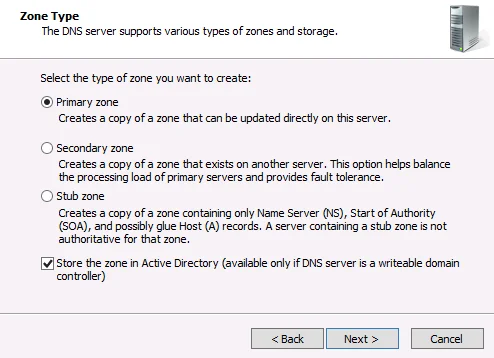
Select Primary zone and Store the zone in Active Directory if available.
Click Next.
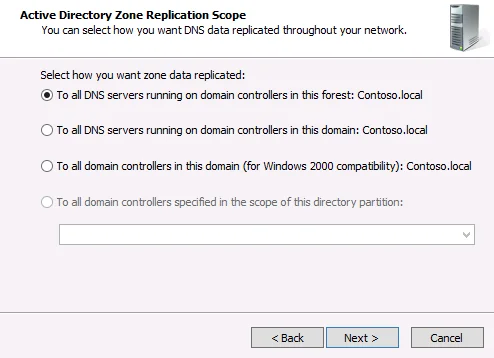
- Select To all DNS servers running on domain controllers in this forest.
Click Next.
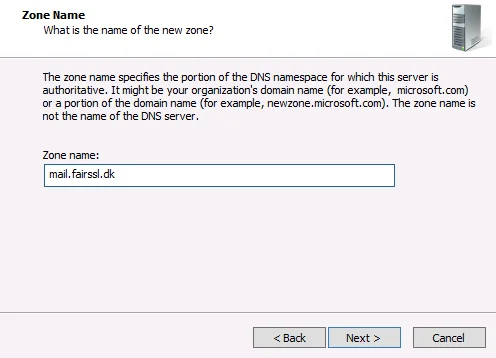
- Enter the DNS name that internal DNS should point to (e.g., mail.fairssl.dk).
You can also choose to create a zone for the entire domain (e.g., fairssl.dk), but this requires manually creating a host record for every single DNS entry used in that domain (see step 10).
Click Next.
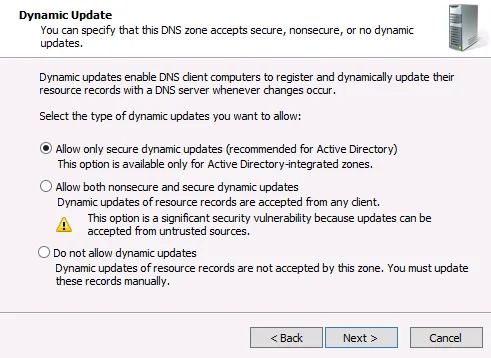
- Select Allow only secure dynamic updates.
Click Next.
Click Finish.
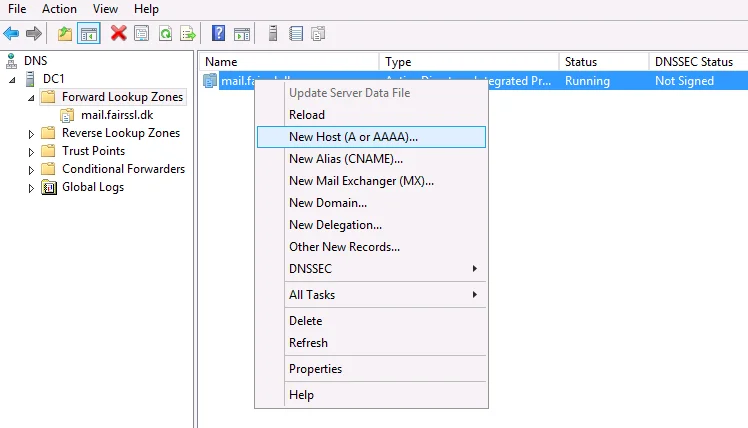
- Right-click on the new Forward Lookup Zone and select New Host (A or AAAA).
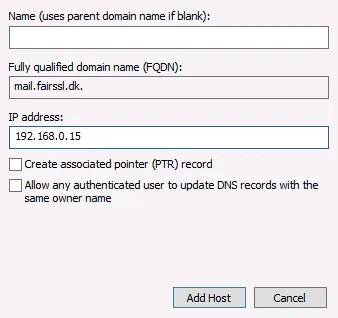
- Leave the Name field blank.
Enter the internal IP address of the Exchange server.
If you have a Reverse Lookup Zone or plan to create one, check Create associated pointer (PTR) record; otherwise, leave it unchecked.
Click Add Host.
- If you chose to create a zone for the entire domain, follow these steps and remember to create a host record for every DNS name you use (e.g., www.fairssl.dk, vpn.fairssl.dk, login.fairssl.dk).
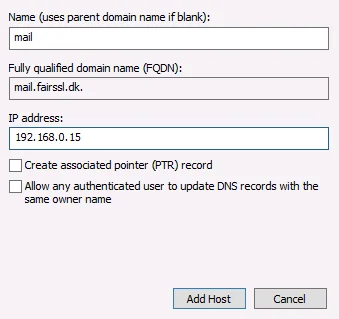
Enter the subdomain name (e.g., mail) in the name field.
Enter the internal IP address of the Exchange server.
Check Create associated pointer (PTR) record if required.
Configuring Internal and External Exchange Service URLs
- Log in to the Exchange server with an administrator account.
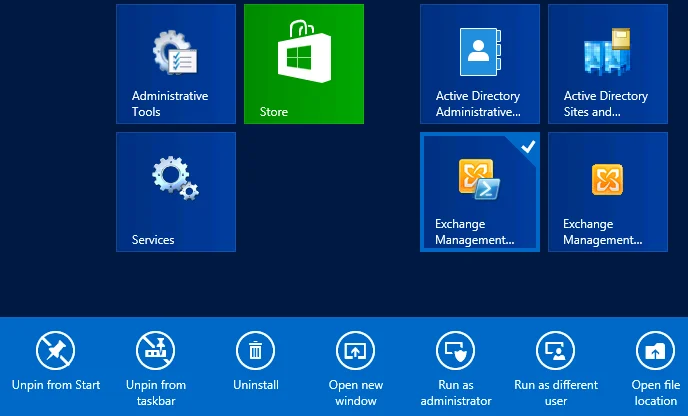
- Right-click on the Exchange Management Shell.
Select Run as Administrator.
- Run the following command:
Get-ExchangeServer | fl name
- Run the following command:
SERVERNAVN is the name you found in step 3. INTERNURL is the internal address for the mail server (e.g., exch01.fairssl.dk). EKSTERNURL is the external address for the mail server without https:// (e.g., mail.fairssl.dk). Ensure you keep the quotation marks around the variables:
$CASserver = ”SERVERNAVN” ; $internalURL = ”INTERNURL” ; $externalURL = ”EKSTERNURL”
- Run the following commands to switch the URLs to the internet-valid addresses (see step 6 for the full combined script):
Get-AutodiscoverVirtualDirectory -Server $CASserver | Set-AutodiscoverVirtualDirectory –InternalUrl ”https://$internalURL/Autodiscover/Autodiscover.xml” -ExternalUrl ”https://$externalURL/Autodiscover/Autodiscover.xml”
Get-ClientAccessServer -Identity $CASserver | Set-ClientAccessServer –AutodiscoverServiceInternalUri ”https://$internalURL/Autodiscover/Autodiscover.xml”
Get-WebservicesVirtualDirectory -Server $CASserver | Set-WebservicesVirtualDirectory –InternalUrl ”https://$internalURL/Ews/Exchange.asmx” -ExternalUrl ”https://$externalURL/Ews/Exchange.asmx”
Get-OabVirtualDirectory -Server $CASserver | Set-OabVirtualDirectory –InternalUrl ”https://$internalURL/Oab” -ExternalUrl ”https://$externalURL/Oab”
Get-OwaVirtualDirectory -Server $CASserver | Set-OwaVirtualDirectory –InternalUrl ”https://$internalURL/Owa” -ExternalUrl ”https://$externalURL/Owa”
Get-EcpVirtualDirectory -Server $CASserver | Set-EcpVirtualDirectory –InternalUrl ”https://$internalURL/Ecp” -ExternalUrl ”https://$externalURL/Ecp”
Get-ActiveSyncVirtualDirectory -Server $CASserver | Set-ActiveSyncVirtualDirectory -InternalUrl ”https://$internalURL/Microsoft-Server-ActiveSync” -ExternalUrl ”https://$externalURL/Microsoft-Server-ActiveSync”
- The following block combines all the above commands into a single line for easy copy-and-paste. If you have already executed step 5, there is no need to run this:
Get-AutodiscoverVirtualDirectory -Server $CASserver | Set-AutodiscoverVirtualDirectory –InternalUrl ”https://$internalURL/Autodiscover/Autodiscover.xml” -ExternalUrl ”https://$externalURL/Autodiscover/Autodiscover.xml” ; Get-ClientAccessServer -Identity $CASserver | Set-ClientAccessServer –AutodiscoverServiceInternalUri ”https://$internalURL/Autodiscover/Autodiscover.xml” ; Get-WebservicesVirtualDirectory -Server $CASserver | Set-WebservicesVirtualDirectory –InternalUrl ”https://$internalURL/Ews/Exchange.asmx” -ExternalUrl ”https://$externalURL/Ews/Exchange.asmx” ; Get-OabVirtualDirectory -Server $CASserver | Set-OabVirtualDirectory –InternalUrl ”https://$internalURL/Oab” -ExternalUrl ”https://$externalURL/Oab” ; Get-OwaVirtualDirectory -Server $CASserver | Set-OwaVirtualDirectory –InternalUrl ”https://$internalURL/Owa” -ExternalUrl ”https://$externalURL/Owa” ; Get-EcpVirtualDirectory -Server $CASserver | Set-EcpVirtualDirectory –InternalUrl ”https://$internalURL/Ecp” -ExternalUrl ”https://$externalURL/Ecp” ; Get-ActiveSyncVirtualDirectory -Server $CASserver | Set-ActiveSyncVirtualDirectory -InternalUrl ”https://$internalURL/Microsoft-Server-ActiveSync” -ExternalUrl ”https://$externalURL/Microsoft-Server-ActiveSync”Generating a CSR for Certificate Ordering
- Log in to the Exchange server with an administrator account.
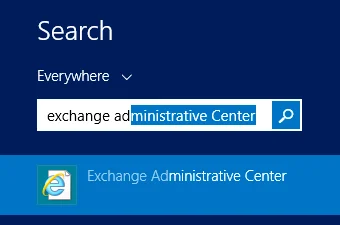
- Press the Windows Key.
Type Exchange ad to search for the console.
Launch Exchange Administrative Center.
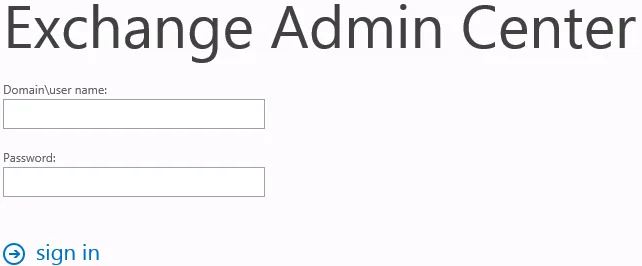
- Enter your administrator credentials.
Click sign in.
- Click servers in the left-hand navigation.
Select the server that requires a certificate renewal from the list.
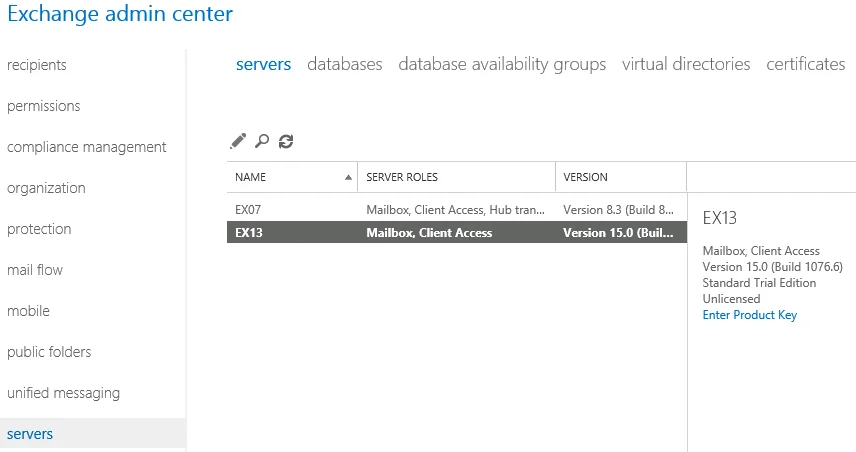
- Click certificates in the top right corner.
Click the + icon.
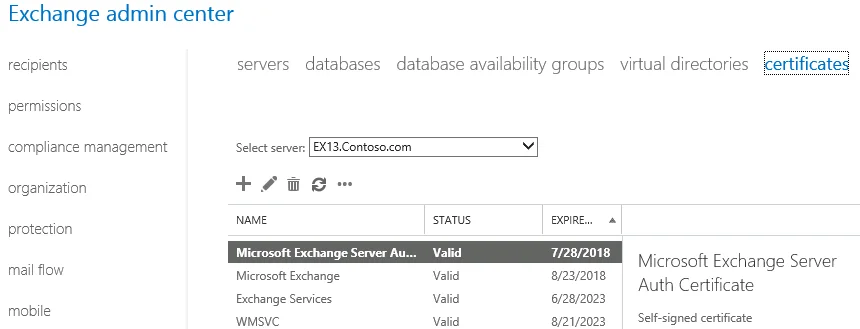
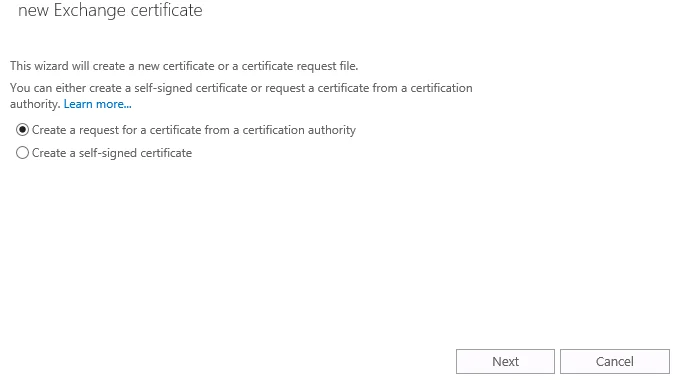
- Select Create a request for a certificate from a certificate authority.
Click Next.
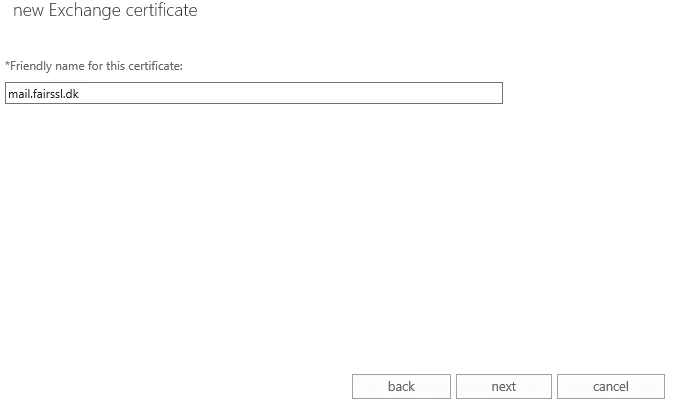
- Enter a Friendly Name for the certificate (e.g., the primary DNS name) to identify it later.
Click Next.
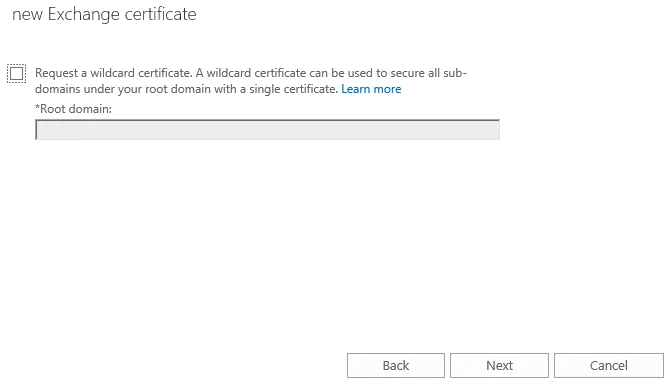
- Ensure that Request a wildcard certificate is NOT selected.
Click Next.
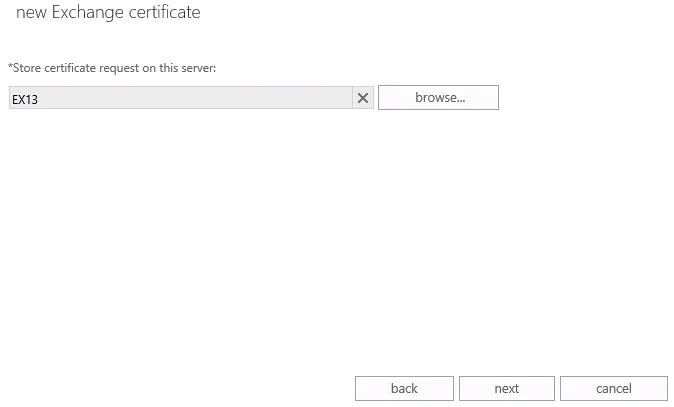
- Click Browse and select the server.
Click Next.
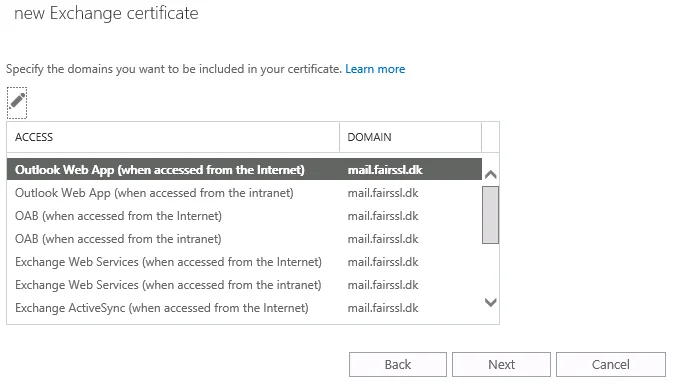
- In this step, you can specify which DNS names each service should use internally and externally.
If any entries use .local or other internal-only suffixes, they must be changed. See Moving from Internal to Publicly Valid Server Names. You can complete the CSR before making these changes if necessary.
Click Next.
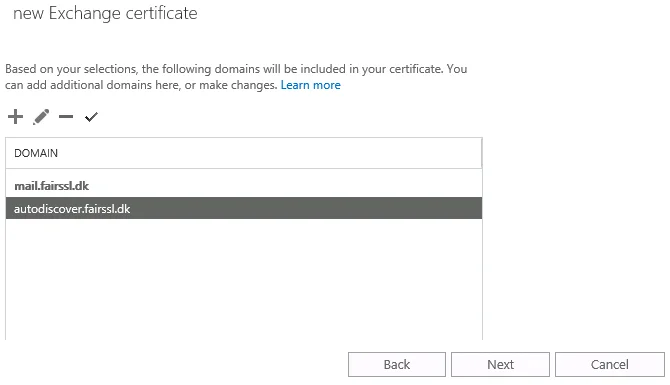
- Remove any DNS names you do not need and add the ones you do.
Click Next.
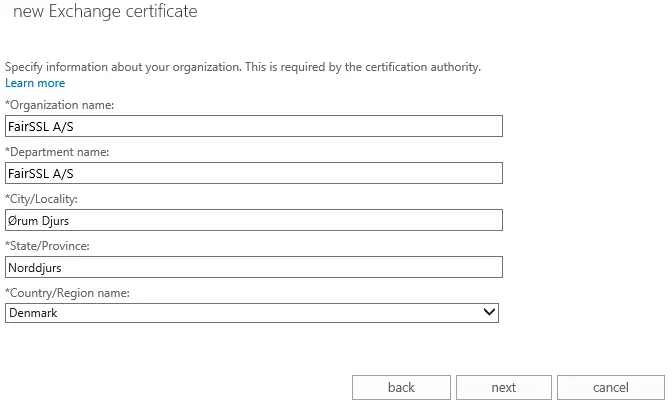
- Enter your organisation details:
- Organization name (O): The full legal name of your company. E.g., FairSSL Ltd
- Department name (OU): The department requesting the certificate. This should not be confused with another entity. It is often left blank or set to the company name. E.g., IT Department
- City/Locality (L): Your city. E.g., London
- State/Province (S): Your county or state. E.g., Greater London
- Country/Region name (C): The country where the company is registered. E.g., United Kingdom
Click Next.
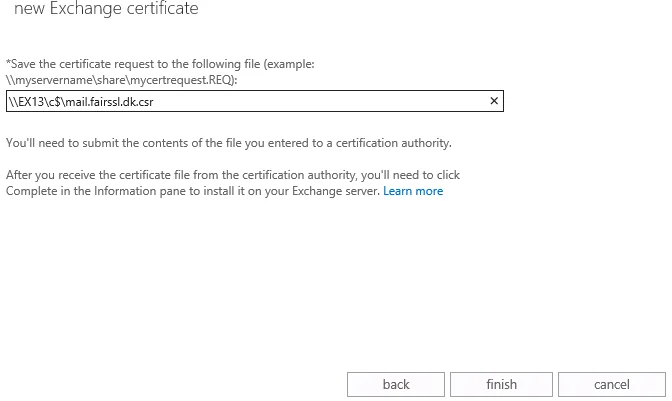
- Enter the UNC path where you want to save the CSR file. The following example saves it to c:\www.fairssl.dk.csr on the Exchange server.
Click Finish.
- Open the CSR file with a text editor (such as Notepad) and copy the entire block of text, including the begin and end tags.
When ordering your certificate, paste this text into the CSR field.
Below is an example of a complete CSR text:
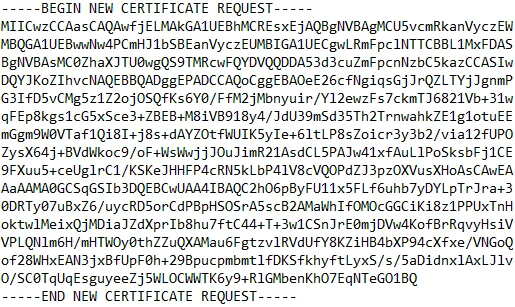
A CSR contains no confidential information or keys; there is no security risk in sending a CSR via unencrypted email.
Importing the Intermediate Certificate Authority
The following instructions describe how to import intermediate certificates on a Windows-based server, including Exchange. To ensure clients can verify the trust chain, the public certificate of the intermediate authority must be installed on the Exchange server.
Note that Windows sometimes installs this automatically when you install the server certificate. Importing the same intermediate certificate multiple times is harmless; you will simply receive a warning that it already exists.
- Log in to the Exchange server with an administrator account.
Copy the Intermediate Certificate text from your certificate delivery email into a text editor (like Notepad). Save the file to your desktop as intermediate.cer
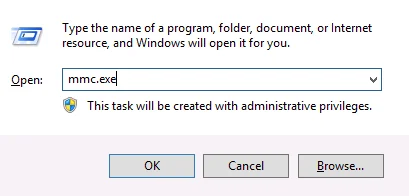
- Press Windows Key + R
Type mmc.exe
Click OK.
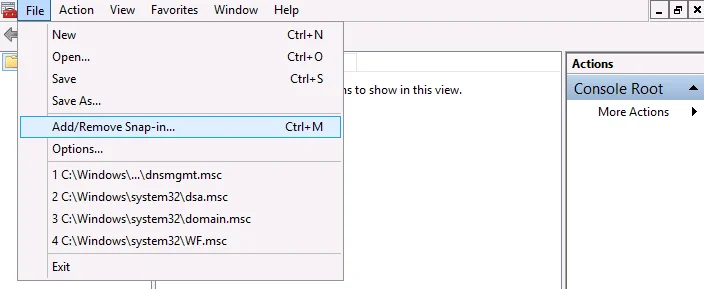
- Click File and then Add/Remove Snap-in.
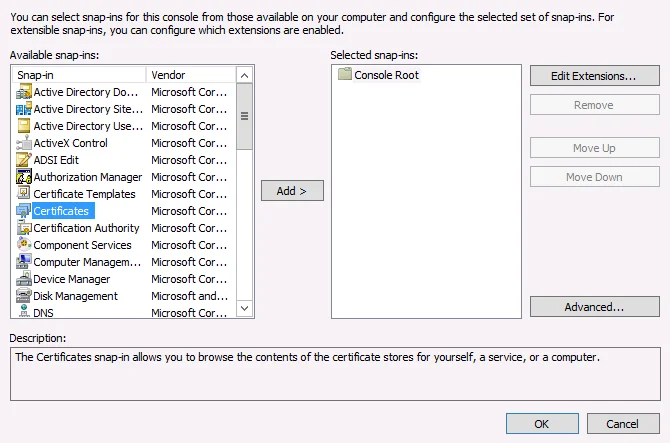
- Select Certificates and click Add.
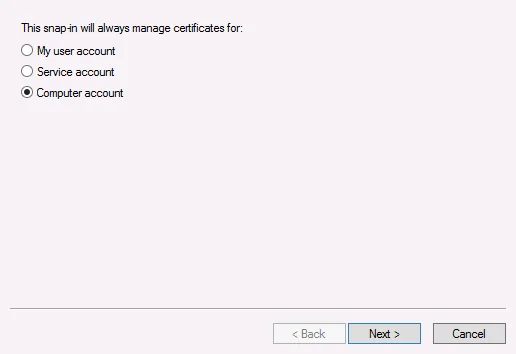
- Select Computer account and click Next.
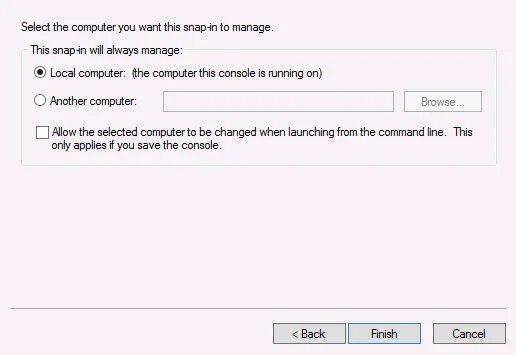
- Ensure Local computer is selected and click Finish, then OK.
- Expand Certificates (Local Computer) and Intermediate Certification Authorities.
Right-click on Certificates, select All Tasks, and click Import.
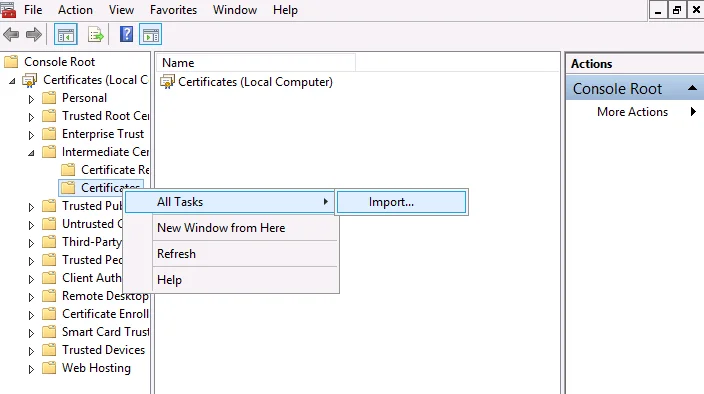
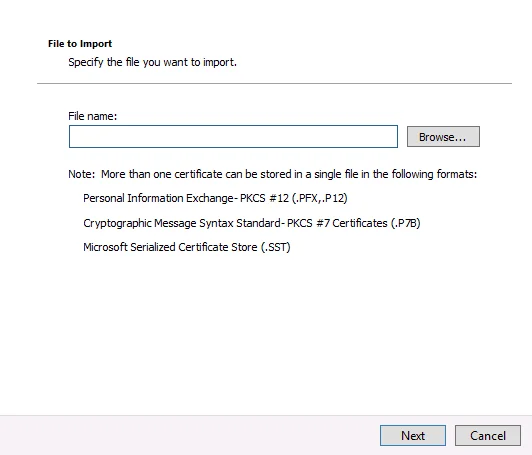
- Click Browse and select the file you saved to your desktop. Click Next.
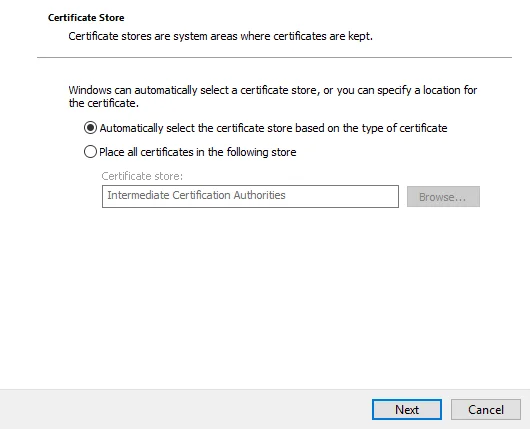
- Choose Automatically select the certificate store based on the type of certificate.
Click Next and then Finish.
You can find intermediate certificates for various authorities below. We strongly recommend using the one provided with your certificate, as it is guaranteed to match your issued server certificate.
Installing the Certificate from a Pending Request
It is vital to install the certificate on the same server where the CSR (Certificate Signing Request) was generated, as the private key resides only on that machine.
The private key was created during the CSR generation process; this installation step binds that private key to the new certificate.
- Save your new certificate file in a location accessible by the server via a UNC path.
e.g., \\EX13\c$\www.fairssl.dk.cer
- Press the Windows Key.
Search for Exchange ad and launch the Exchange Administrative Center.
- Log in with your administrator credentials.
- Go to servers on the left, select the correct server, and then click certificates in the top right.
- Select the Friendly Name you assigned when creating the CSR; its status will show as Pending request.
Click Complete in the right-hand pane.
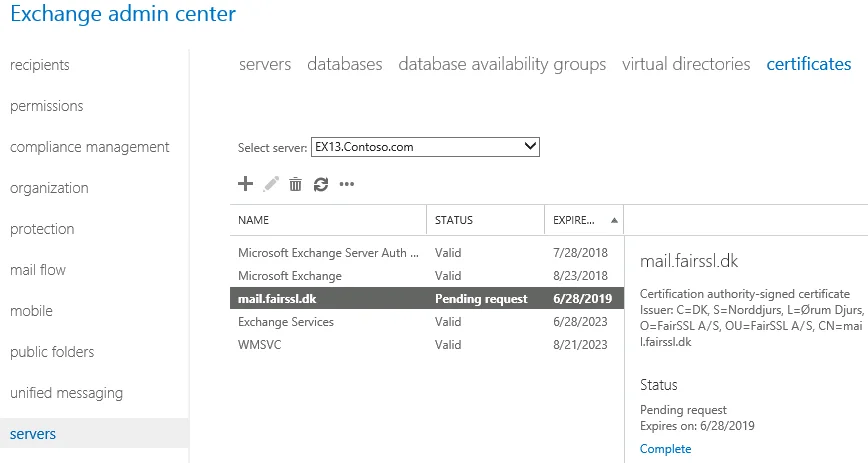
- Enter the UNC path to your certificate file.
Click OK.
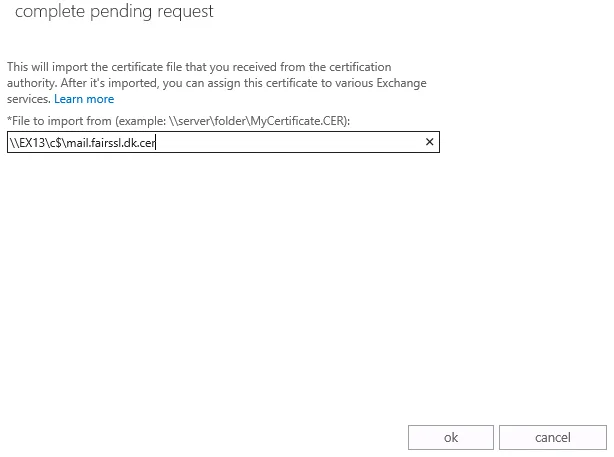
- The certificate will be installed, and its status will change from Pending Request to Valid in the certificate list.
We recommend verifying the installation using our SSL Scanner at: https://www.fairssl.com/en/tools/ssl-scanner
Assigning Services to the Certificate
- Log in to the Exchange server with an administrator account.
- Press the Windows Key, search for Exchange ad, and launch the Exchange Administrative Center.
- Sign in with your administrator credentials.
- Navigate to servers > certificates and select the relevant server.
- Highlight the certificate you wish to activate.
Click the ✏ (Edit) icon.
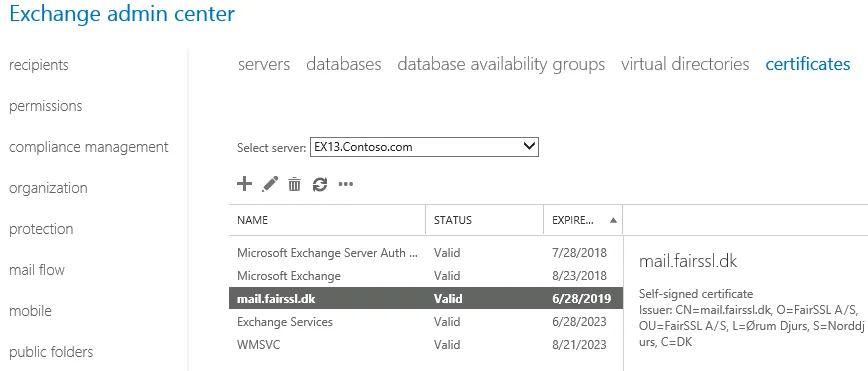
- Click Services in the left-hand pane.
Tick the services you want to assign to this certificate (e.g., IIS, SMTP). Click Save.
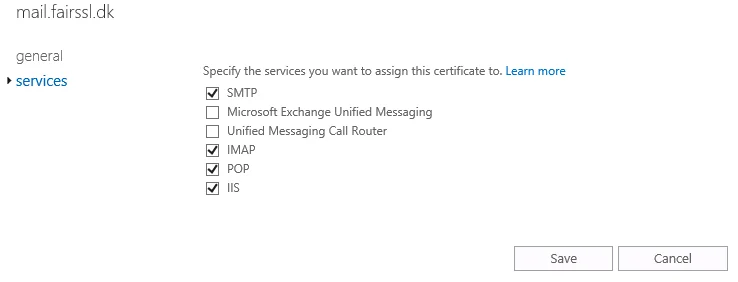
- If you selected SMTP, a prompt will appear asking if you want to overwrite the default SMTP certificate.
Click Yes.
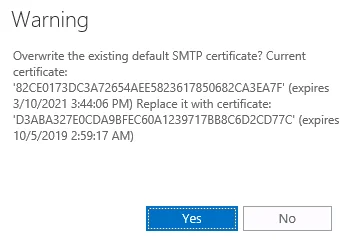
Finally, test your installation using our SSL Scanner: https://www.fairssl.com/en/tools/ssl-scanner
Strengthen your TLS security
Use IIS Crypto to easily configure secure TLS protocols and cipher suites on your Windows Server.
IIS Crypto TLS configuration guide